Pixelcade Setup Guide for Windows Maximus Arcade
|
Step 1 Download and Install Pixelcade |
Tested
on Windows 7 and Windows 10 |
||||||||||
|
|
§ Download
and install the Pixelcade LED Marquee software for
Windows
§ Install
Pixelcade under your Maximus Arcade install
directory like C:\MAX 2.10\Pixelcade for example. |
||||||||||
|
|
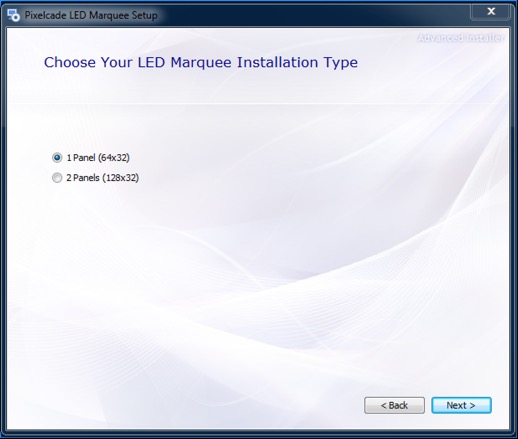
§ Choose
< 1 Panel (64x32) > if you have one LED matrix panel for a 64x32
resolution or < 2 Panels (128x32) > if you are daisy chaining 2 LED
matrix panels. The artwork will be different based on this selection. |
||||||||||
|
|
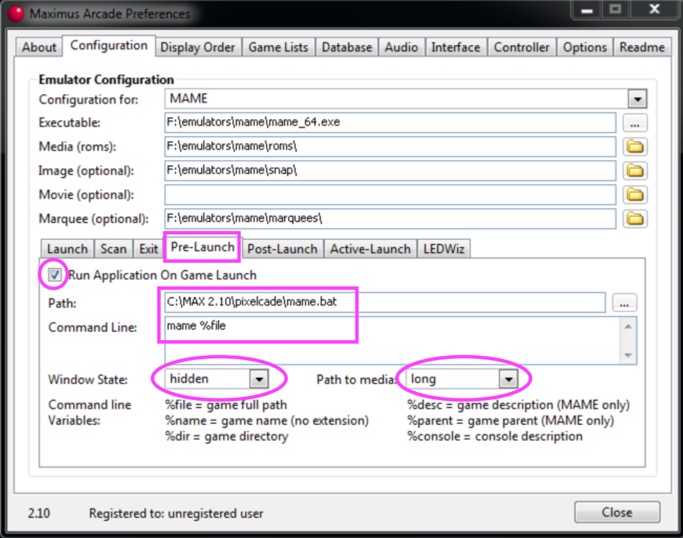
§ Launch
Maximus Arcade Preferences § For
each emulator, select the “Pre-Launch” tab and select the respective .bat
file for the emulator (ex. mame.bat for MAME or atari2600.bat for atari2600). § Check
the box Run Application on Game Launch § Select
the respective .bat file like mame.bat for MAME and atari2600.bat for
atari2600. These files will be located in the Pixelcade
folder. § Enter
the respective .bat file name and %file in the Command Line box. For example,
mame %file for MAME and atari2600 %file for
atari2600. § Choose
“hidden” for the Window State and “long” for Path to media. Repeat
for each desired emulator, some examples:
The following
emulators have .bat files and a default LED GIF but you can add additional
ones too following the same format 3do.bat amiga.bat atari2600.bat atari5200.bat atari7800.bat atari800.bat atarijaguar.bat atarilynx.bat atarist.bat c64.bat capcom.bat coleco.bat daphne.bat dreamcast.bat fba.bat futurepinball.bat gamegear.bat gb.bat gba.bat gbc.bat intellivision.bat mame.bat mastersystem.bat msx.bat n64.bat neogeo.bat nes.bat ngpc.bat odyssey.bat pcengine.bat ps.bat ps2.bat psx.bat saturn.bat sega32x.bat segacd.bat snes.bat ti99.bat vectrex.bat visualpinball.bat wonderswancolor.bat zinc.bat zxspectrum.bat |
||||||||||
|
|
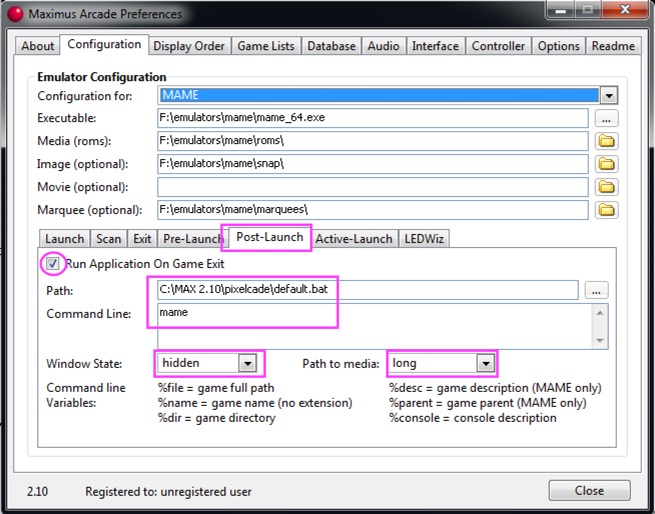
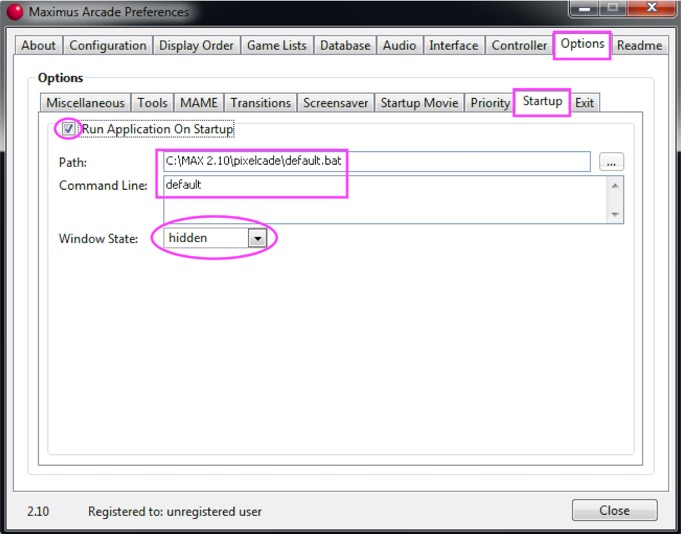
§ Choose
“Options” and “Startup” § Check
the box Run Application on Game Launch § Select
default.bat § Enter
mame in the Command Line box. § Choose
“hidden” for the Window State and “long” for Path to media. § This
will change to the default LED marquee when Maximus Arcade first starts. Repeat
for each desired emulator, some examples:
|
||||||||||
|
|
|
||||||||||
|
If
you’re on Windows 10, the PIXEL board will show up as “USB Serial Device”
If
installing the driver manually
Right
click and Choose Update Driver Software…
Browse
to the driver folder in your Pixelcade installation
|
§ Power
on your PIXEL board using a 5V power supply plugged into the DC barrel
jack. Plug into your USB port on your
PC using the included USB A-A cable. § Ensure
the toggle switch on the board is pointing towards “USB”, it will not work if
it’s pointing towards “BT”. § Your
board will show up under Windows device manager in the Ports selection as
either PIXEL-LED (Windows 7) or USB Serial Device (Windows 10). § If
you’re on Windows 7 and need to install the PIXEL LED board driver manually,
it’s located under <Your Pixelcade Install
folder>\driver § Take
a note of the COM port that has been assigned. |
||||||||||
|
|
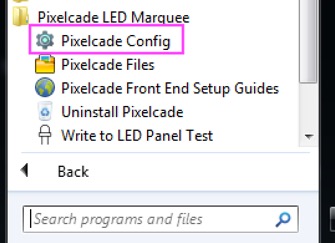
§ From
the Windows start menu, launch “Pixelcade Config” § Change
the port to match your PIXEL board from the previous step. § The
install program will automatically set the Led Resolution to 64x32 if you
selected 1 panel or 128x32 if you selected 2 Panels from the earlier steps.
But you can change here if you change your installation type later. |
||||||||||
|
|
§ Now
let’s run a test and check if your PC is communicating to Pixelcade. § Launch
“Pixelcade Test Write to LED Panel” § If
successful, you’ll see the output on the left and the 1941 game logo will be
displayed. § If
not successful, check in Windows device manager that the board has been
recognized and double check that you have selected the correct port in “Pixelcade Config” If you receive an error java was not found,
then you’ll need to install Java. VERY IMPORANT: You
must install Java 32-bit, Java 64-bit is not compatible https://java.com/en/download/manual.jsp |
||||||||||
|
|
§ Now
launch Maximus Arcade and after selecting a game, the LED display should
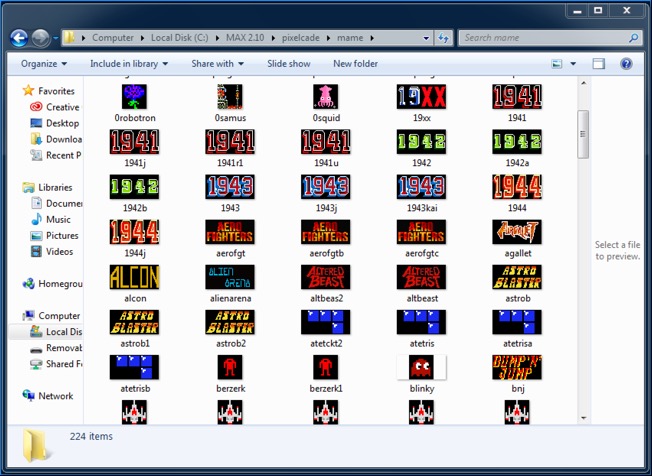
change to a generic LED marquee respective to the selected emulator. § You
can add specific LED marquees for your favorite games by creating a 64x32 or
128x32 .GIFs using your favorite image editor like
Photoshop. Simply name the .GIF to match the rom name and place in < your pixelcade install \ emulator >. § So for example, the game 1941 has four roms: 1941.zip 1941j.zip 1941r1.zip 1941u.zip So
you would create one .GIF design and make 4 copies with the names: 1941.gif 1941j.gif 1941r1.gif 1941u.gif And place them in for example C:\MAX 2.10\Pixelcade\mame Be sure and use the .gif extension and not the extension
of the rom. If the game selected in Maximus Arcade does not have a
specific GIF, then a generic GIF for the selected emulator will be
automatically selected instead. |